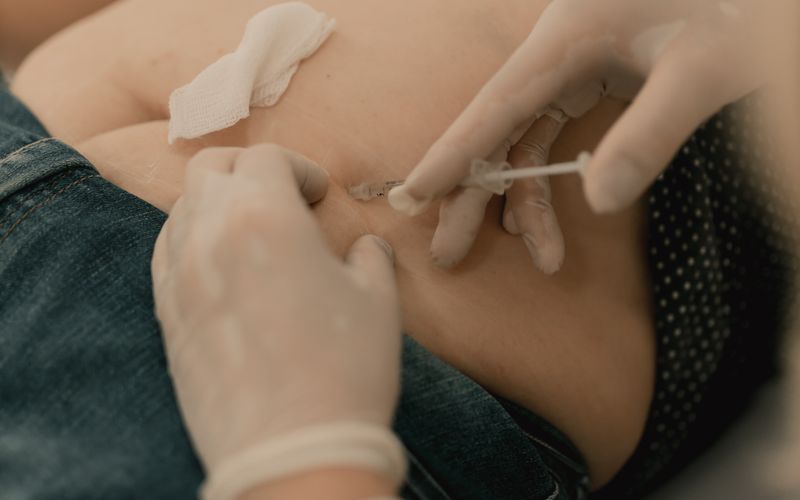
Subcutaneous is the default
Almost everything discussed on this site is given subcutaneously — into the fat layer under the skin, not into muscle. It is shallower, more comfortable, easier to do on yourself, and it is what most of these compounds are intended for.
| Subcutaneous | Intramuscular | |
|---|---|---|
| Goes into | Fat layer under the skin | Muscle body beneath it |
| Absorption | Slower, steadier | Faster, shorter |
| Needle | Short and fine, 4–12 mm | Longer, wider bore |
| Self-administration | Straightforward | Harder; siting errors carry real risk |
| Typical use here | Nearly everything | Occasional, compound-specific |
This page does not teach IM technique. Not because it is exotic, but because the consequence of getting the site wrong is nerve injury rather than a sore patch, and safe landmarks are something to be shown on your own body by someone qualified rather than read off a page. If a compound genuinely calls for IM, get taught it once and you will have it for good.
Where to site it
| Site | Notes |
|---|---|
| Abdomen the usual first choice |
Largest usable area and the easiest to reach. Stay at least two inches clear of the navel, and off scars, moles and stretch-marked skin |
| Outer thigh | The outer front quarter, mid-way between hip and knee. Keep away from the inner thigh, which is closer to vessels and nerves |
| Back of the upper arm | Works well if someone else is doing it. Awkward to pinch properly one-handed on yourself |
| Upper buttock / flank | Plenty of tissue and useful for widening a rotation, but you are working blind |
Avoid anywhere bruised, inflamed, broken, tattooed over recently, or already lumpy from previous injections. If a site looks different from the skin around it, use a different one.
The procedure
- Wash your hands and check the solution is clear.
- Swab the site and let it dry completely. Going in through wet alcohol is what makes it sting.
- Expel the air. Point the needle up, tap the barrel, push until liquid appears. Small bubbles under the skin are harmless, but they cost you dose accuracy.
- Pinch a fold of skin and fat between thumb and forefinger, lifting it away from the muscle underneath.
- Insert in one committed movement. Around 45° if you are lean or using a longer needle, closer to 90° with a short needle and more tissue. Hesitating hurts more than going in.
- Push slowly — five to ten seconds for a small volume. Fast injection stings and leaks back out.
- Release the pinch, withdraw straight out, and press with clean gauze for a few seconds.
- Dispose of the needle in a sharps container without recapping. Log the site.
The source material this page was built from suggests massaging the site to help distribute the dose. Standard guidance for subcutaneous injection is the opposite: press briefly if it needs it, but do not rub. Rubbing does not improve distribution and it makes bruising and irritation more likely.
Needle and syringe
| Choice | Usual range | Why |
|---|---|---|
| Length | 4–12 mm | Shorter is generally better. A 4–6 mm needle reaches subcutaneous tissue in most adults regardless of build, and makes hitting muscle much harder |
| Gauge | 29–31G | Higher number, thinner needle, less sensation. Thin bores push slowly, which suits small volumes anyway |
| Syringe | 1 mL insulin | Fixed needle, fine graduations, and unit markings that match the arithmetic |
A fixed-needle insulin syringe wastes less in the hub than a detachable one, which matters when the whole dose is a fraction of a millilitre.
Rotation, and what it prevents
The failure mode has a name: lipohypertrophy. Injecting the same patch repeatedly builds firm, rubbery lumps of thickened fatty tissue. They are usually painless, which is why people keep using them — and they often become preferred sites, because scarred tissue is less sensitive.
That is the trap. Absorption from a lipohypertrophic site is reduced and erratic. Decades of diabetes practice show the same pattern: a protocol that was working becomes unpredictable, and nothing about the vial or the dose has changed.
- Move at least an inch, ideally two, from the last injection.
- Work a pattern rather than choosing in the moment — quadrants of the abdomen, or a grid worked left to right.
- Give a specific spot a week before returning to it. Daily dosing therefore needs several areas in rotation, not one.
- Write it down. Nobody reliably remembers where they injected four days ago.
- Feel the sites occasionally. Firmness or thickening that was not there before means stop using that area and let it recover, which takes months rather than days.
Making it hurt less
- Let the solution lose its chill. Cold liquid stings. A few minutes out of the fridge is enough — do not warm it deliberately, and never heat it.
- Let the alcohol dry. Most of the sting people blame on the needle is alcohol carried into the puncture.
- Go in decisively. Slow, tentative insertion drags the skin and hurts more.
- Push slowly. Speed of insertion and speed of injection want opposite settings.
- Use a fresh needle every time. One pass blunts the tip enough to notice on the next.
- Unclench. Injecting into tensed tissue is worse. Breathe out as you go in.
What is normal afterwards, and what is not
| Normal | Not normal |
|---|---|
| A pinprick of blood; brief stinging; a small bruise; a pale bump that settles in minutes | Redness that spreads, especially with heat or a hard edge |
| Mild tenderness on the day | Pain increasing after the first day rather than fading |
| Occasional itch at the site | Fever, or feeling systemically unwell |
| A drop of liquid escaping on withdrawal | Widespread rash, swelling of the face or throat, breathlessness |
The right-hand column is covered properly in the risk primer. In short: a spreading, hot, hard site is a possible infection and wants seeing the same day, and the last row is anaphylaxis and wants an ambulance.
Three things people ask
- Should I draw back to check for blood? Aspiration is not recommended for subcutaneous injection. The vessels there are tiny, the practice delays things, and it makes the needle move in the tissue.
- What if I hit a small vessel? Occasionally you will, and it bleeds or bruises a little. Press, and use a different site next time. It is not an emergency.
- Does a bubble matter? A small air bubble injected subcutaneously is harmless. Expel it anyway, because the space it occupies is dose you did not give.
Before you act on any of this
This describes a general technique for education. It is not a recommendation to inject anything, and correct technique says nothing about whether a substance is safe or legal for you to use. Injecting at home carries genuine infection risk. If you have a bleeding disorder, take anticoagulants, or have any condition affecting healing or immunity, this is a conversation to have with a clinician first.